Round 63 in BTD6 is one of the most common wipe points in the game — not just for beginners, but for experienced players switching to a new difficulty or running an unfamiliar map. It’s not the hardest round in BTD6 (rounds 95–100 are significantly harder), but it’s the first round that punishes unprepared defenses without warning. Players who breezed through rounds 1–62 suddenly lose all their lives in seconds and don’t understand why.
This guide explains exactly what happens at BTD6 round 63, why it wipes unprepared players, and the specific tower setup that survives it.
What Makes BTD6 Round 63 Dangerous
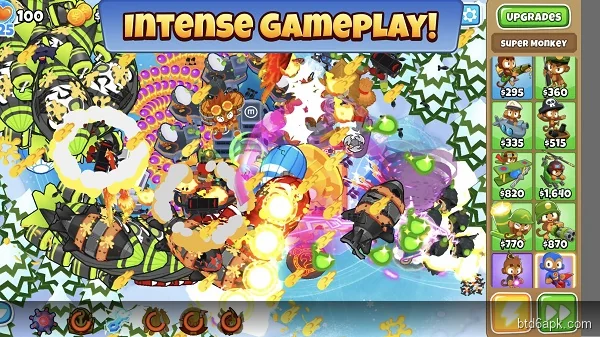
Round 63 sends a dense wave of MOAB-class bloons — specifically multiple MOABs in close succession, with Ceramic Bloons filling the gaps between them. The problem isn’t the MOABs themselves. The problem is the Ceramics that follow them.
Here’s the round 63 threat sequence:
- First MOABs appear at round 40. Most players build just enough DPS to pop them one at a time.
- Rounds 40–62 train players to handle individual MOABs with moderate DPS.
- Round 63 sends multiple MOABs in rapid succession — your DPS that handled one MOAB at a time can’t process the queue fast enough.
- The children of popped MOABs (4 BFBs per MOAB, then 4 MOABs per BFB) stack up mid-path while new Ceramics are still arriving from the entry point.
- Two simultaneous paths of dense bloons exceed most mid-game defenses.
On Impoppable and CHIMPS, where bloons have 40% more HP and you have only 1 life, round 63 becomes even more dangerous. A single BFB child reaching the exit ends your run.
BTD6 Round 63 Tower Setup
To survive round 63 reliably in 2026, you need three things in place before the round starts:
1. One Tier 4 MOAB-Class Damage Tower
Your primary MOAB popper needs to be at Tier 4 by round 60. Options ranked by effectiveness:
- Dartling Gunner (4-0-2): Laser Cannon with Powerful Darts. Tracks MOABs automatically and shreds them at consistent DPS. Best single-tower solution for round 63.
- Super Monkey (2-0-3): Robo Monkey deals strong MOAB damage and handles the Ceramic waves simultaneously with its dual cannons.
- Ninja Monkey (0-0-5): Grand Saboteur reduces all MOAB-class HP by 50% for 15 seconds. Use the ability right as round 63 begins and every MOAB enters with half health.
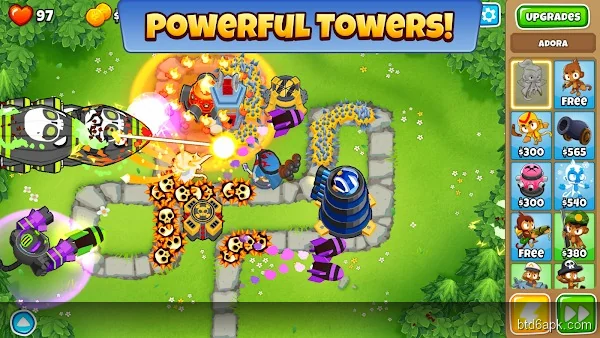
2. AoE Coverage for Ceramic Children
When MOABs pop, each one releases 4 Ceramic Bloons. At round 63, the map fills with Ceramics simultaneously. You need AoE damage — not single-target DPS — to clear them:
- Bomb Shooter (2-0-3): Cluster Bombs deal AoE damage to Ceramic groups.
- Mortar Monkey (0-2-3): Shell Shock covers a wide path area and handles grouped Ceramics efficiently.
- Wizard Monkey (4-2-0): Archmage clears Ceramics and handles Regrowth simultaneously.
3. Camo Detection on Every Damage Tower
Camo Bloons appear from round 24 onward, but at round 63 a Camo Regrowth Ceramic can slip through mid-MOAB chaos and exit if your camo detection has any gaps. A Monkey Village (0-2-0) with Military Intelligence Bureau gives nearby towers camo detection — place it centrally so your main DPS towers fall within its range.
BTD6 Round 63 on Different Difficulties
Easy and Medium Difficulty
On Easy and Medium, round 63 is serious but manageable with a Tier 3+ damage tower and basic MOAB coverage. The bloon HP at these difficulties is standard, and you have enough starting cash from earlier rounds to be prepared. If you’re wiping on round 63 at Easy, the issue is tower placement rather than upgrade level — reposition your MOAB tower to hit the longest straight section of the path.
Hard Difficulty
Hard mode gives you fewer starting lives (100 vs. 200 on Easy) and standard bloon HP. Round 63 on Hard is where most players first realize their mid-game setup is underfunded. The fix: spend cash on tower upgrades in rounds 55–62 specifically, even if it means delaying your next Banana Farm purchase.
Impoppable Difficulty
Impoppable gives you 1 life and MOABs have 40% more HP than standard. Round 63 on Impoppable requires your Tier 4 MOAB tower to be in place by round 58–59. One extra MOAB surviving through your defense on Impoppable ends your run. Our full Impoppable mode guide covers the Impoppable-specific economy strategy that ensures you’re ready before round 63 arrives.
CHIMPS Mode
CHIMPS disables all income towers and Monkey Knowledge. Round 63 is one of the hardest checkpoints in the entire CHIMPS run because you’ve had no farm income to fund a Tier 4 tower — every cash dollar came from popping bloons. The CHIMPS-specific round 63 setup prioritizes Ninja Sabotage ability timing over raw DPS. Read our CHIMPS mode guide for the full CHIMPS round 63 strategy.
BTD6 Round 63 — Common Mistakes
- Spending all cash on Banana Farms right before round 63: Farms pay off over time, but upgrading them in rounds 58–62 at the cost of your Tier 4 upgrade leaves you underpowered for the actual threat. Prioritize your damage tower first, farms second.
- Relying on a single-target tower: Sniper Monkeys and Dartling Gunners deal good MOAB damage but pop MOABs one at a time. The Ceramic children from the first MOAB overwhelm single-target coverage while you’re still dealing with the second MOAB. Add AoE coverage alongside single-target DPS.
- No hero ability ready: Hero abilities with cooldowns should be saved for round 63 specifically. Obyn’s Wall of Trees, Ninja Sabotage (from Ninja Monkey), and Gwendolin’s Firestorm all change round 63 from dangerous to manageable if used on time.
Round 63 is the last major checkpoint before the endgame stretch. Survive it with a strong setup and rounds 64–80 feel manageable. Struggle through it with barely enough defense and rounds 64–80 cascade into repeated failures. Get your Tier 4 tower in place before round 60 and you’ll clear round 63 cleanly.
For the next major difficulty spike after round 63, rounds 78–85 bring BADs, DDTs, and dense MOAB stacks. Our BTD6 tower tier list ranks every tower that handles those threats effectively.
Frequently Asked Questions
What happens on Round 63 in BTD6?
Round 63 sends 2 ZOMGs (4,000 HP each) supported by Ceramics. It's the first round with multiple ZOMGs simultaneously and catches many players off guard.
What towers counter Round 63 in BTD6?
MOAB Mauler (Bomb Shooter 2-3-0) is the most cost-efficient counter — each shot deals 1,000 damage to MOAB-class. Three Maulers provide 3,000 DPS against incoming ZOMGs.
Does Round 63 appear in CHIMPS mode?
Yes — Round 63 is identical across all game modes. Without Monkey Knowledge in CHIMPS, plan your MOAB-killing capability from round 55 onward.
Is Round 63 or Round 78 harder in BTD6?
Round 78 (3× ZOMGs + Fortified Ceramics) is technically harder, but Round 63 eliminates more players because it's unexpected on a first playthrough.